Photoshop Inking Tutorial: Ink a Cartoon Character Step by Step
Updated 10/11/2026
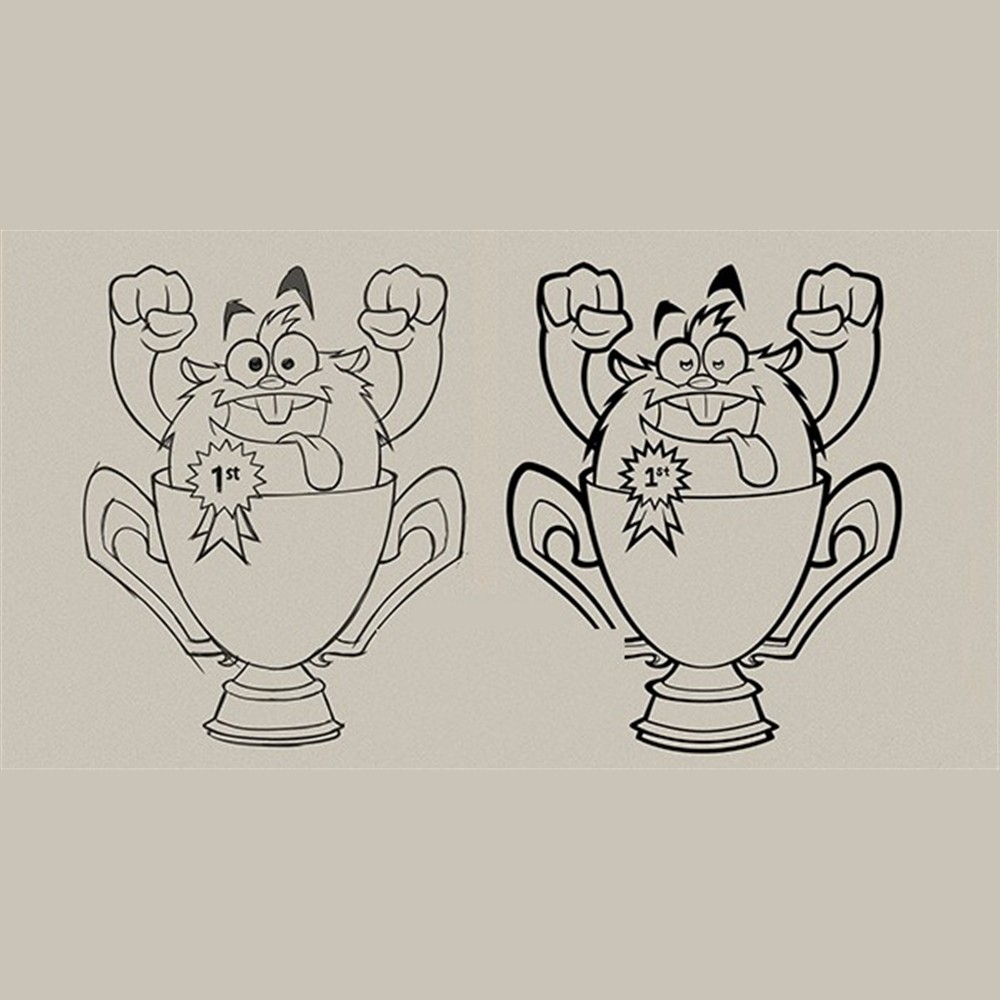
This is how I ink a mascot in Photoshop: the same method I use on every mascot I design for clients, once the character design process has settled the sketch. We go from that sketch to clean, modulated lines; the coloring tutorial picks up where this one ends.
It is for anyone with basic Photoshop knowledge who already has a sketch, digital or on paper. Here are the files to practice along:
Download
Practice files: the two sketches and the finished inking (PSD and AI) and the Photoshop actions (ZIP)
Digital Inking in Photoshop or Illustrator?

Photoshop
It's easy and fun with a tablet.
You can hand draw and use vectors.
Easier to master the vector and bitmap tools.
More fluid and natural workflow.
Workflow for digital design.
Illustrator
Many more advanced tools to draw and color vectors.
Customizable interface: you can detach the tools from the sidebar.
More precise vector tools from bitmaps.
More vector editing power.
Workflow for print design.
General Tips
People often ask me ... "What is the secret to achieve such perfect lines like yours!!?", and I answer: "Before learning to shoot a gun you must learn to load it properly".
Here are some general tips that will not save you like Private Ryan, but at least they will guarantee you some decent results:
Your Setup
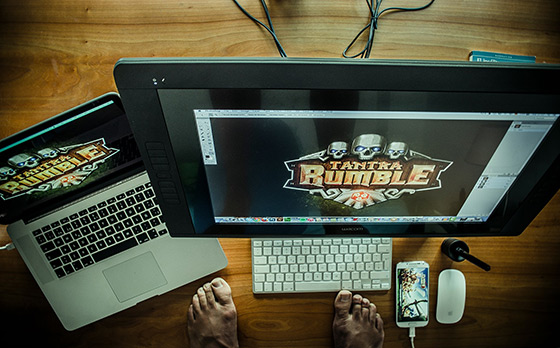
The hardware is important
The best way to do digital inking easily and faster is a Wacom Cintiq or the new Companion tablets (those monitors or tablets that are pressure sensitive). Drawing freehand with a standard Wacom tablet takes a lot of practice and with a mouse it is nearly impossible; you will see yourself in the obligation of using vector drawing tools.
Size matters
Always use a high resolution canvas, minimum 4,000 x 4,000 pixels, maximum whatever your computer can handle. Without pixels there is no definition, and without definition your lines will look shaky and with breakage.
Hard brushes
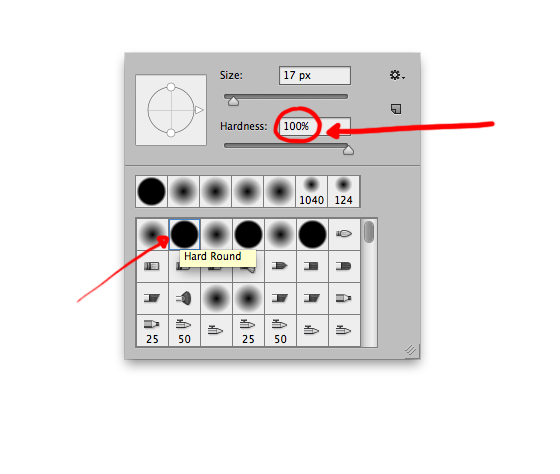
Use the brushes with hard edges that come with Photoshop by default; the ones with soft edges, like spray, do not give good results.
Multiply
Use your lineart layer in "Multiply" mode, that way you will be able to work with only one tool: a black brush to draw, a white brush to erase (using the keyboard "X" you can interchange them). Also you will have the sketch always visible.
Line Weight: the Golden and Silver Rules
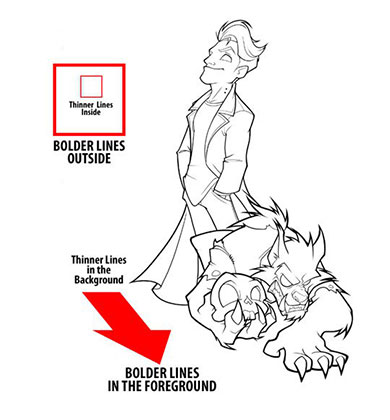
Line weight is the thickness of each line. Two rules give a drawing depth: thicker lines on the outer edges and thinner inside, and thicker on what is closer to the viewer. This is the difference between a flat drawing and one with volume before any color.
Less is more
Do not overdo your drawing with lots of internal lines; limit yourself to define the main volume, to guide yourself later on for the digital color.
Within variety resides good taste
Add variety to each line, every single corner counts... do not leave any stroke without working it well. If one line is completely straight or it has a constant width, it will look boring and artificial.

Golden rule
Thicker lines on the edges, thinner inside, so you leave room for volume with the color. If a line goes from edge to inside, taper its width.
The silver rule
The line width increases if the object is closer to the viewer ... guess what happens if it gets farther away 😉
Your Workflow
Layers are free
Use them to draw elements that overlap; it is much easier to create two separate objects and then blend them, than to draw them both on the same layer.
Inside out
It is much easier to start inking the thinner lines (the internal lines) and then increase the weight on the exterior lines.
Play with History
You only need one basic brush and two colors to create a good inking work; with the History brush you will be able to do the same job in less time.
Leave your ego aside
If one line is too complex or you cannot get it done well by hand, use the vector drawing tools ... what matters is the end result, not your ego.
Patience
The key to a good inking work is working the lines area by area and linking them together; only the big masters are able to make long strokes without losing control. It usually takes me 3 hours to ink just one character.
Pro tip
The secret ingredient? Practice! Not even my marvelous tutorials will be able to do the job for you 🙂
Now that we know the basic tactics, we will learn the guerrilla tactics: first the basic vector drawing tools in Photoshop (outlining strokes and then creating vector shapes), then the Brush and the History Brush (a very versatile tool which can save you many war wounds); later we apply all of it on a practice exercise, and finally a short video shows how to vectorize your lines in Illustrator.
1. Basic Inking: Stroking Lines
This method consists of creating paths using the vector drawing tools in Photoshop, then we stroke the vector paths obtaining a very basic bitmap inking (or also in vectors).
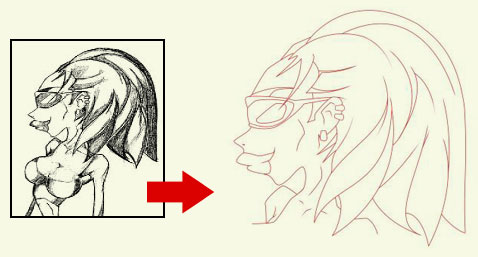
Although we can apply different line widths, we cannot modulate the lines, I mean, the result is a constant line. It might be adequate for simple designs or illustrations where the color takes a bigger center role.
Advantages:
- You do not need a lot of Photoshop knowledge.
- It is very fast.
- You can do it with your mouse.
Disadvantages:
- The aspect is very basic, even if you add different widths, the line is plain and boring, it offers an artificial look.
Video 1: Basic Inking (3:30)
This 3 minute video is for beginners, the goal is simply to teach them how to use the basic vector drawing tools … patience, on the next video we will get ourselves deepen into the battlefield 🙂
This video is coming soon. Subscribe to the newsletter to get notified.
2. Advanced Inking: Filling Path
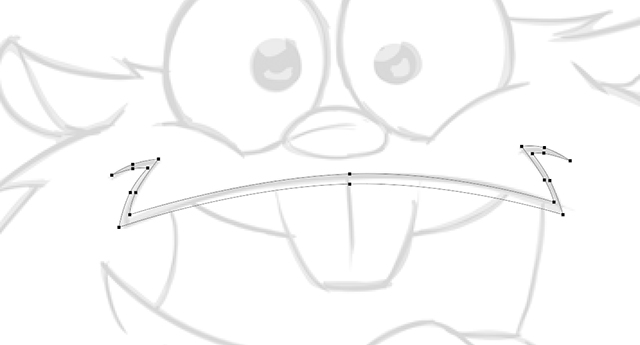
This method is similar to the previous one, but instead of stroking the lines, we will create fill areas (either in bitmaps or in vectors), these allow us to vary the width and the type of vertex in each line, e.g., we can modulate the width of every single line.
Advantages:
- The inking itself has more personality, we can use it without color.
- Quality results, very clean and organic.
- You may use the mouse.
Disadvantages:
- It takes more time.
- It is not as fun as drawing freehand with a Wacom tablet.
Video 2: Fill Path (2:07)
In this video I teach you how to create modulated lines (on bitmaps or vectors) using the vector drawing tools and the mouse. If you are an intermediate Photoshop user, you might not need it.
This video is coming soon. Subscribe to the newsletter to get notified.
Get your mascot
Because your customers will notice.
3. The Photoshop Brush
If you have a Wacom Cintiq (or at least a standard digital tablet) I suggest you to draw freehand, so that you will be able to take advantage of the bitmap based tools: the History, the Brush, the History Brush, the Eraser ... which will give you better fluidity when you work.
If you only have a humble mouse, I suggest you to use the vector drawing tools. Drawing freehand with a mouse is only for the brave 😉
The Photoshop Brush is pretty intuitive, it does not need further explanation. The only thing you must take into account is the fact that you must use high resolution canvas (minimum 2,000 x 2,000) and hard-edged brushes.
Video 3: The Brush (0:45)
In this video I briefly explain to you the basic mechanics when it is time to draw lines with the brush, later on we will develop all the concepts in a practice case.
This video is coming soon. Subscribe to the newsletter to get notified.
Keyboard Shortcuts:
- "B" selects the brush.
- "ALT" selects the canvas colors.
- "X" alternates between background and foreground colors.
4. The History Brush
The history brush is a tool that often times goes unnoticed, but which you could be taking advantage of, since it allows us to paint back in time, wtf!!?
At first it is difficult to understand the concept, but it is very simple ... In all software programs we can fix mistakes undoing actions (normally by using CTRL+Z or Undo), in Photoshop the History Panel functions in the same exact way. In a way we could say that we travel back and forth in time, and even we freeze it thanks to the snapshots.
Video 4: The History Brush (1:51)
In this video I briefly explain to you how it works. Remember that we have already talked about the importance of using the history brush when it comes to coloring.
This video is coming soon. Subscribe to the newsletter to get notified.
Pro tip
Every time you finish a part, mark it as source for the history brush and take snapshots frequently.
Why Doesn't the History Brush Work?
The History Brush is a powerful weapon, but it has some limitations:
- It works in only one layer, if you want to modify several layers you have to do it one by one.
- It works on the existent layer on both points in history, I mean, between the origin state (the history brush source) and the actual state. If we flatten, erase or delete a new layer, the History Brush will not work.
- The number of events saved in the History is limited. From the preference panel in Photoshop you can increase the number of saved events (Edit > Preferences > Performance), although it will consume more resources. To work around this issue we can also create snapshots of our canvas.
5. Let Us Learn How to Modulate Lines
And finally, after a lot of preparation, we have reached "D" day, the "H" hour, the moment that separates little kids from men ... the most important video of this tutorial 🙂
Video 5: Modulating Lines (32:52)
In this video we will work on an inking that lasts about 3 hours in length, compressed in 30 minutes, where we will overview all that we have previously learned from a practice point of view, it contains all that you need to become an expert inker.
This video is coming soon. Subscribe to the newsletter to get notified.
Pro tip
Whatever the tools, on paper, in vectors or on a Cintiq, what matters is understanding the basic principles and applying them on any medium.
6. Vectorization on Photoshop or Illustrator
I am not a big fan of vectors: I prefer to do my inking freehand with my Wacom Cintiq in Photoshop and, if necessary, vectorize it later with Live Trace in Illustrator.
Video 6: Vectorization (6:44)
In this video I explain to you how to vectorize in Photoshop (much faster but with less precise results) and how to vectorize in Illustrator (more complex but with better results) … the ideal is to know how to use both and to decide according to your work circumstances.
This video is coming soon. Subscribe to the newsletter to get notified.
The End
We have finally finished ... if you followed along, you should have something similar to this, congratulations!!!

In this tutorial you have learned how to use all the drawing tools in Photoshop in a professional way: to build strokes and vector shapes, to outline strokes and to fill shapes, to draw freehand or with a mouse, to clean up and extract lines, to use the history brush, layer modes and vectorization ... just like I would do it for any SOSFactory client. Now you only have to practice and personalize the technique to your own needs.
And Now What?
Perfect lines are not worth it if you are not good at the art of coloring. If you want to take your designs to the next level, I recommend my tutorial about digital color in Photoshop.

Inking is one part of the job. Every mascot I deliver starts with a concept built around the client's brand and ends as artwork ready for print, web and merchandising. Need a mascot for your business? See my mascot design service.
Until next time!!!
Mascot designer for 23 years, with 500+ characters drawn for brands, schools and teams. My tutorials have been published in Smashing Magazine and Envato Tuts+.